Thursday, February 01, 2007

Mittens for Alex

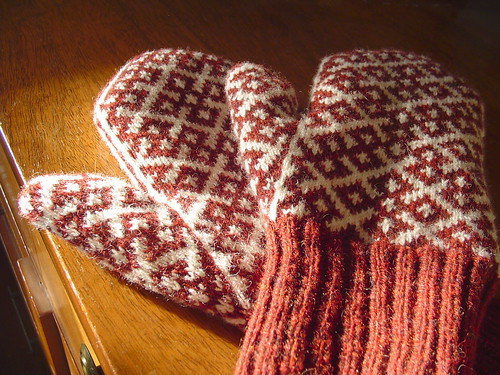
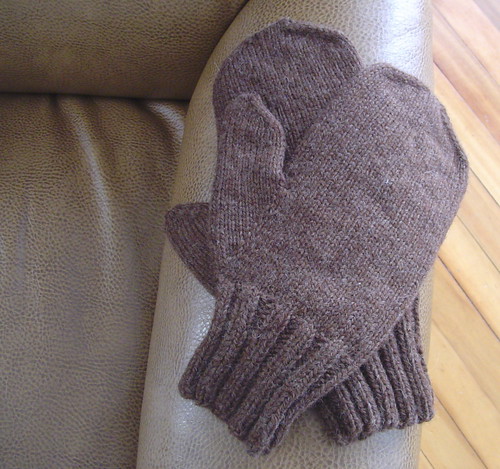
Alex's mittens


Cascade Eco Wool, my own pattern

I decided to create my own mitten pattern because I had trouble finding a basic pattern out there that was exactly what I wanted. I realized that, since I was fond of Charlene Schurch's basic mitten shaping/construction, I should take the mittens I just made as a starting point, and calculate all the specifics based on my gauge (in a much thicker yarn) and the hand size I wanted to knit for. Here is my pattern:

materials
  • 100 grams of Cascade Eco Wool (This yarn comes in 250g / 478 yard skeins, and is what I consider a heavy worsted/aran weight. 100 grams of this yarn is about 190 yards.)

  • size 6 DPNs, or size needed to achieve gauge

  • 2 lengths of a smooth scrap yarn

  • 2 stitch markers

  • darning needle

gauge
5.5 stitches and 7 rows per inch, in stockinette

sizing
These mittens were designed to fit a hand that measures 8" in circumference. There is about 1" of ease, resulting in mittens that are about 9" around. If your hand is smaller or larger, or you want a looser or tighter fit for the mitten, play with gauge, stitch count, and row count. It's not that hard once you understand how the mitten is constructed. (Note: I designed these mittens to have about 1" of ease in length, as well. But because the length of the mitten when worn is slightly different then when measured flat, you'll want to try the mitten on as you go to determine the correct length.)

casting on / cuff
Using your preferred stretchy cast on (I prefer Twisted German -- link to pdf), cast on 44 stitches. Distribute over 4 DPNs, and join in the round without twisting. Knit 21 rounds of k2p2 ribbing.

lower hand / thumb gusset
The rest of the mitten is in plain stockinette. On the next (first stockinette) round, increase 6 stitches, for a total of 50 stitches. I did the increases as follows:

k7, inc, k7, inc, k8, inc, k7, inc, k7, inc, k7, inc, k1


Knit one plain round.

Gusset shaping starts on the next round. K24, place marker (pm), make 1 right (m1r), k1, make 1 left (m1l), pm, k25. (If you need instruction on how to make increases, try this site. Their strand increase 1 = my m1r, and their strand increase 2 = my m1l.)

Knit one plain round

Alternate increase and plain rounds 8 times more. For each increase round, create a stitch right after the first stitch marker and right before the second stitch marker, knitting all other stitches between the markers.

At the end of the gusset shaping, there should be 19 stitches between the stitch markers. Knit the next row, placing all 19 of these stitches on scrap yarn (and removing the stitch markers), and casting on one stitch in their place. There should now be 50 stitches on your needles, and 19 thumb stitches on the scrap yarn.

the rest of the hand
Knit around and around, with no increases or decreases, for 33 rows. (An easy way to make the hand longer and shorter is to alter the number of rows you knit in this section.)

decreases and finishing the hand
Knit the next round as follows: ssk, knit 20, k2tog, k1, ssk, knit 20, k2tog, k1

Continue in a similar manner every round, decreasing 4 stitches per round. (It may be helpful to mark the "seam" stitches between the paired decreases with stitch markers.) For example, the next round will be: ssk, knit 18, k2tog, k1, ssk, knit 18, k2tog, k1

When there are only 14 stitches left on the needles (6 from the mitten front, 6 from the mitten back, and the 2 seam stitches between the paired decreases), you are done knitting. Arrange the stitches so they are split between only 2 needles, 7 front and 7 back. Graft these stitches together using kitchener stitch.

thumb
Put the thumb stitches from the scrap yarn back on your needles as follows: 7 on the first DPN, 7 on the second DPN, and 5 on a third DPN. Pick up 2 stitches from the thumb "crotch", and put them on the third DPN, for a total of 7 on that needle. Knit one round, knitting the two picked up stitches through the back loop, to help tighten them up. Knit 10 more rounds plain.

Start thumb decreases: ssk, knit around to 3 stitches before the end of needle 3, k2tog, k1. Repeat this decrease row every round until there are only a total of 9 stitches left on the needles. (You'll have to shift some stitches around from needle 2 to needles 1 and 3.) Break the yarn, and using a tapestry needle, draw it through the 9 stitches, poke it down through the hole in the center at the top of the thumb, and pull tight until the hole is closed.

finishing
Weave in ends, and block as desired. You may need to close up holes at the thumb crotch when weaving in ends, depending on how successful you were at avoiding them when picking up stitches.

And when you're finished with the first mitten, cast on for the second one. Because the thumb grows out of the side of the mitten, there is no designated left or right mitten. This means that you can follow the same instructions for the other mitten.


If I were to knit these mittens again, I might do so on smaller needles, at a tighter gauge. These mittens, in this yarn, are acceptable at this gauge, but could be denser. I was concerned about not having enough yarn, when it turns out I only needed 2/3 of what I had. (The rest, though, will go into storage for any future repairs needed on the mittens, hat, or sweater.) If I were to knit these mittens for myself, in the same yarn, I'd simply go down a needle size or two to make them smaller. Alex has bigger hands than I do. See:
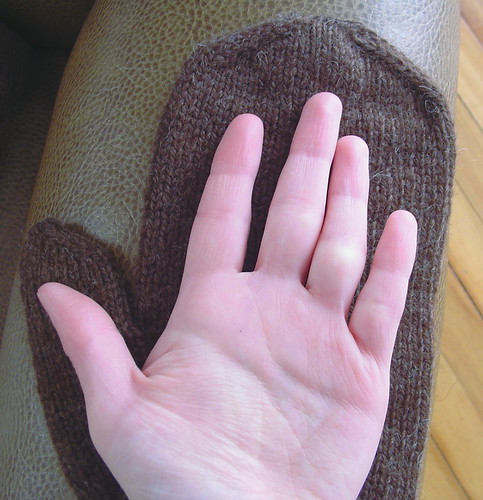
Alex's mitten, my hand


I'm still in simple knitting mode. Simple mittens, and now fairly simple socks. (A chevron/rib pattern, in yarn so bright I'm almost afraid to see what happens when I photograph it.) I have some slightly more complex projects I want to knit with yarn in my stash, but between needle issues and hand pain (not caused by knitting, but certainly affecting it), I'm finding it difficult to get started on anything complex. We'll see how I feel when the socks are done.

Labels: , ,

Tuesday, January 09, 2007

not monochrome

my Komi mittens


pattern 25 (the one on the cover) from Charlene Schurch's Knitting Marvelous Mittens
Harrisville Shetland Style (fingering weight)
extra pointy size 00 needles

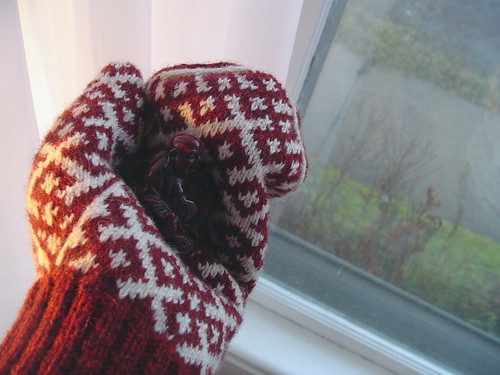
Should I go into the saga of getting a decent photograph of these mittens? I'm not sure what it was. Maybe I'm rusty with the camera, maybe the light was never quite right, or maybe I just need a better camera. But I took hundreds of photos over 2 days (not an exaggeration), and really wasn't fully satisfied with anything. I finally got the above shot this morning, which isn't my ideal finished project shot, but I figure there are enough in-progress photos to give a better idea of the size and shape of these particular mittens. My best modeled shot:

my Komi mittens


There's no particular reason for the Buddha, except that it was sitting on the windowsill, and was just the right size to cuddle in my new mittens. I like this shot because you get a decent view of the thumb gusset.

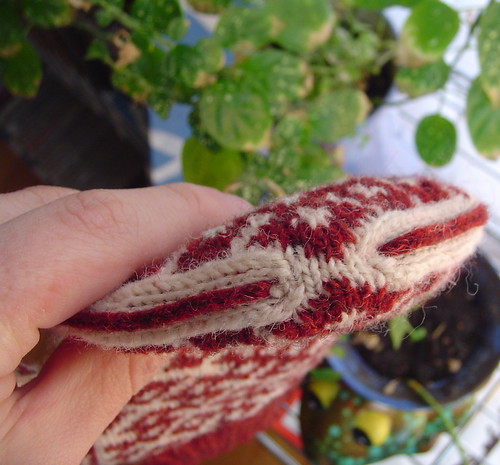
my Komi mittens - tippy top


And the tippy-top.

For all my whining about photos, I'm really happy with these mittens. They're particularly special to me because Alex bought me the yarn on my birthday trip to Harrisville last year, and I finished the mittens on my birthday this year. (It was Sunday, and a big one. So I guess the nice, round Buddha in that shot above is appropriate, to go with my nice, round, shiny new 0.)

Again, I'm very happy with what a washing does to Harrisville yarn. I talked about it when I knit the orange Fibertrends hat last year, and I'll talk about it again. The yarn is so much softer after a washing, and the bloom really finishes the colorwork nicely. On a recent Weavecast, Syne and one of her guests were talking about finishing weaving, and how it's not really cloth until you wash it and do other necessary finishing techniques. I feel that these weren't really mittens until the wash. They were a big, pretty knot of 2 colors of wool. After the Eucalan bath (and an inside-out blocking), they relaxed into beautiful colorwork mittens. I don't think it's something I could have captured in photos, even if I had a better camera and more photography talent. But the change was quite salient in person.

And that blocking really was just washing and drying the mittens inside out. Very easy. For the most part, the mittens are true to the instructions in the book. I skipped the corrugated ribbing on the cuffs, and as I mentioned in my previous post, closed up the tops of the thumbs by pulling the yarn through the remaining stitches (like at the top of many hats), instead of grafting.

(All photos of this project.)

I may end up making a liar out of myself, but this may be the last colorwork for a little while. While I adore colorwork, I've done so much of it recently that I'm a little burned out on it. In the past 12 months, I've knit the Mamluke socks, Ingeborg, the Vertical Stripes pullover, the mitten and hat set, and a couple of bags. Considering the scope of a couple of those projects, I feel like I've barely done anything other than colorwork, though looking through my photo gallery, that's obviously not the case.

There are colorwork projects I really want to work on, when the bug hits me again. (And it will. I have no doubts at all about that. In fact, sitting here thinking about it, I almost feel like I'm ready to start a fair isle sweater. It's been, like, 3 whole days since I knit with more than one color!) I keep mentioning it, and still near the top of my list is the gorgeous cover sweater (Autumn Color Cardigan) from Sweaters From Camp. And there are some things in Latvian Dreams that I can't stop thinking about. But I am looking forward to delving more deeply into textures again, and to having projects that are slightly more portable than all of this colorwork I've been working on. Even when it's just a small 2-color project, like these mittens, it can feel like an ordeal to even move the project from one room to another, what with all of the yarn to get tangled and the chart to keep track of. Time to relax with those plain, grey socks for a few more days. Then on to the next monochrome adventure.

(A., if you're reading this, I couldn't help but borrow your fabulous pseudonym for this post title.)

Labels: , ,

Thursday, January 04, 2007

super secret project

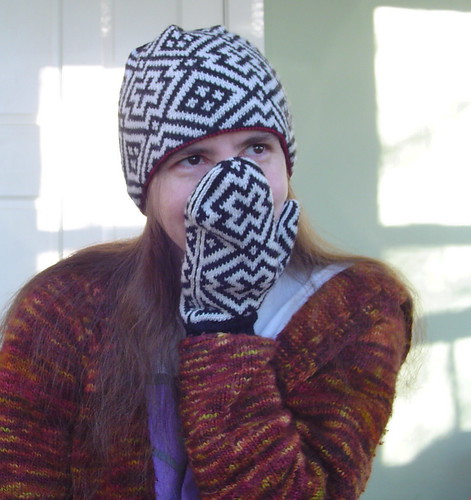
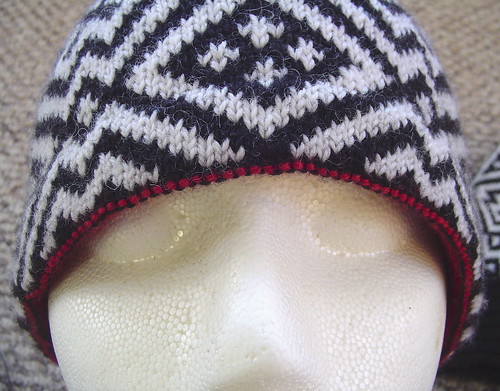
Sage's hat and mitten set - modeled by me


I finished the hat (and mittens!) for Sage (in return for the gorgeous crocheted beret), and have assurances that she won't peek here until she gets them. So I am free to share them with you, which I'm very excited about. The project has been finished since Monday, and was photographed on Tuesday, and it would have been difficult to wait another week or so to write about any of it.

The project started out as just a hat. I decided I wanted to use one of the charts from Charlene Schurch's Knitting Marvelous Mittens as the basis for the hat, and as I was flipping through the book for my inspiration, thought that I might as well knit the mittens, too. In a sport weight yarn, they'd take no time, in comparison to the fingering weight mittens I was working on. I suppose "no time" is all relative, but in the end it was actually a fairly fast project, for something with so many pieces.

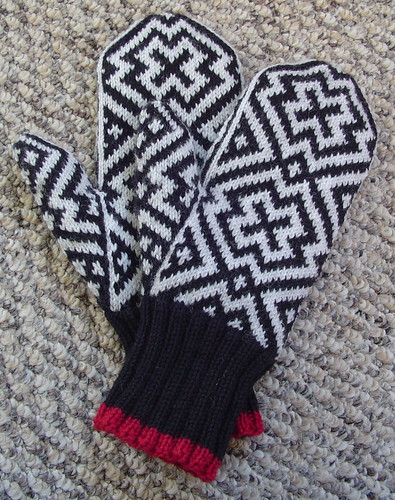
Sage's hat and mitten set - mittens


I used pattern #29 for the mittens. Mittens #29 in the book are in two shades of pink, so I thought this would be a funny one to base my project on, since the one hat request was no pink. More importantly, I liked the pattern, it worked with the weight of yarn I had available, and I thought it would expand well into something larger, for the hat. If you have the book, you'll see that the one obvious change I made to the pattern was on the cuff. Instead of corrugated ribbing, I used plain 2x2 ribbing, with that bit of red at the bottom for some visual interest. As you'll soon see, the red also coordinates with part of the hat.

Another less visible modification is that instead of grafting together the stitches at the top of the thumb, I simply pulled the yarn through, like at the top of a hat. I was concerned that grafting would make the top of the thumb too wide, and this method produced a thumb that looks and fits very nicely. I usually enjoy kitchener stitch, but liked this method so much for these mittens that I'm using it on my own Komi mittens. I did graft the tops of the hands, which I think was necessary in terms of both form and function.

On my list of things to come in 2007 was the story of 4 thumbs. I ended up knitting almost 4 full thumbs for these mittens, though obviously only 2 survived. The first thumb had stitch evenness issues, as I found it quite difficult to do stranded knitting well on such a small number of stitches. The second attempt was better in that department, but humongous. I don't know if it was my knitting or again the challenges of doing colorwork on such a fiddly, small number of stitches, but my gauge had drastically changed. I figured this out after the second thumb was almost completely knit, so then picked up the other mitten, and started its first thumb on size 1 needles. (I knit the mittens on size 2.) That did the trick nicely, and I went back and knit that first mitten thumb for the third time. It was a pain, but each thumb only took a couple of hours to knit, and it was completely worth the effort in the end. (Unless Sage has mutant, lightbulb-like thumbs, in which case she better be reading this, and warn me before I mail them out in a few hours.)

I knit the set with Brown Sheep Naturespun Sport, leftover from Ingeborg and Elizabeth I. I still have a lot of leftovers, but this was a great way to use up a chunk of them. It's the same yarn (in different colors) used for most or all of the sportweight patterns in the book.

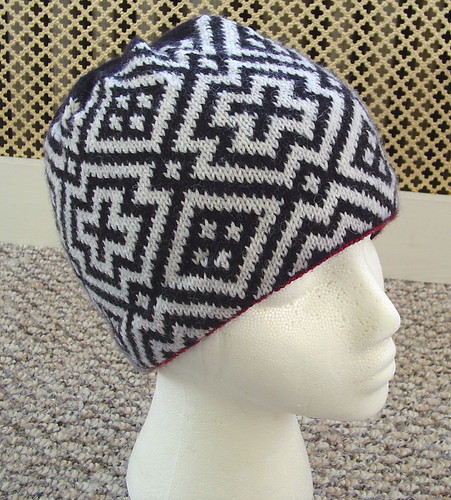
Sage's hat and mitten set - hat


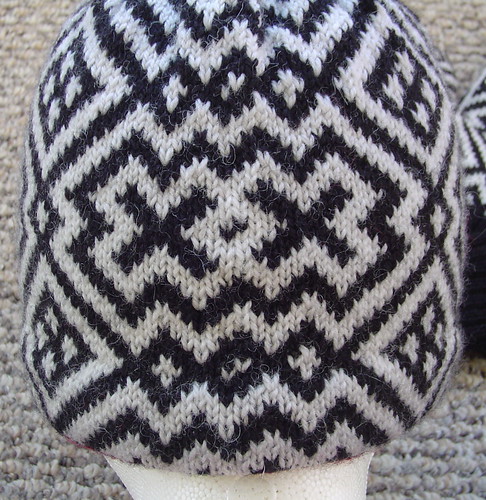
I simply expanded on the mitten chart (fun with Excel) to create the hat chart. I pretty much knew that I would get gauge on the mittens, as my Nordic Mittens were also knit with Naturespun Sport (my first experience with the lovely stuff), on size 2 needles. But it's been a while since I knit those, so in some sense the mittens were an extended gauge swatch for the hat. It turns out that my gauge with that yarn/needle combo hadn't changed, but it was nice to be able to use such a fun project for a swatch. Using my gauge info, I calculated the stitch and row count I'd need for the hat, and adjusted my chart accordingly, to get things nicely centered in the horizontal and vertical. Here is what the jog looks like, on the back of the hat:

Sage's hat and mitten set - back of hat (jog)


I toyed with the idea of putting in a faux-seamline there, like on the sides of the mittens. I eventually decided against it because I think it looks better this way. Obviously, the jog and partial pattern repeats can be seen if you are looking for them. But that spot is a lot less obvious without a big solid line running through it, don't you think? Plus, I like that XX marks the spot. (The spot being the part of the hat that should be at the back of the head, though that preference is obviously up to the wearer.)

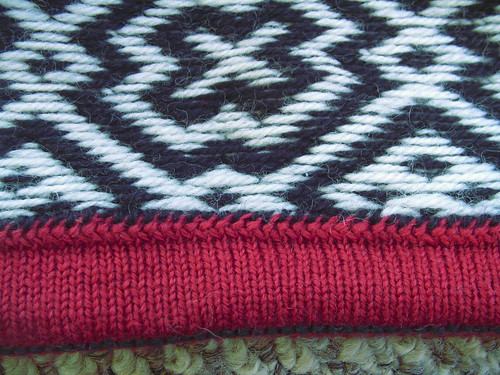
The next question was what to do about the brim. Ribbing? Icord? I eventually settled on a folded under hem:

Sage's hat and mitten set - hat hem


I knit it on size 0 needles ( 2 sizes smaller than the rest of the hat), and sewing it down was the last thing I did. It was a bit fiddly, because of all of the floats between me and the stitches I wanted to attach the hem to. In the end, I actually ended up sewing through a few floats where it was more convenient, as I noticed that it didn't produce any ill effects on the public side of the hat. I really love this secret splash of color, and also like how the turning row reveals just a hint of the surprise inside:

Sage's hat and mitten set - hat brim


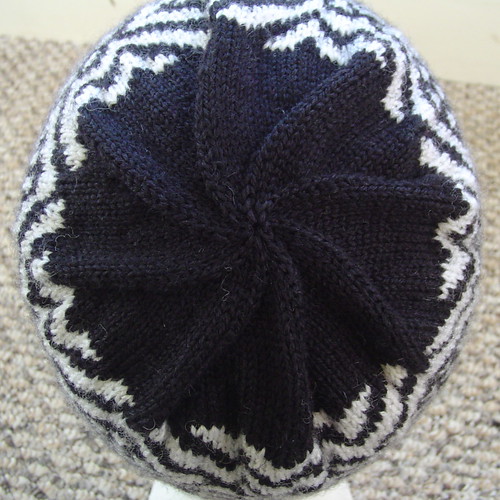
At the top of the hat, I did something a little different than my usual 8-section swirling decrease. I wanted to add some bit of texture or visual interest to that plain black section, so after a few repeats of every-other row decreases, I switched to decreasing on every row. I think it still looks neat and controlled up top, but adds a bit of movement and character.

Sage's hat and mitten set - top of hat


So that's what I was working on while I wasn't posting. I'm about halfway through the second thumb on my own Komi mittens (and, thankfully, there will only be two of those to knit), and am almost halfway through the first grey sock.

I want to apologize to anybody who got a zillion (or 25 or so) of my old posts appearing as new in their blog aggregator, after my last post. I just upgraded to the "new" Blogger, and I think that's what did it. I really cringed, because I know that the livejournal feed flooded some people with a lot of old posts, which is a lot more annoying there than it is using an aggregator like Bloglines. I promise I didn't do it on purpose, and here's hoping that it doesn't happen again.

Labels: , , ,