
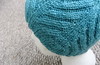
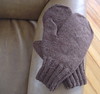
Mittens for Alex
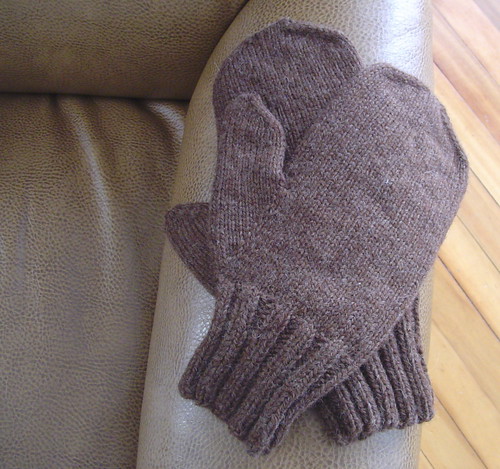
Cascade Eco Wool, my own pattern
I decided to create my own mitten pattern because I had trouble finding a basic pattern out there that was exactly what I wanted. I realized that, since I was fond of Charlene Schurch's basic mitten shaping/construction, I should take the mittens I just made as a starting point, and calculate all the specifics based on my gauge (in a much thicker yarn) and the hand size I wanted to knit for. Here is my pattern:
materials
- 100 grams of Cascade Eco Wool (This yarn comes in 250g / 478 yard skeins, and is what I consider a heavy worsted/aran weight. 100 grams of this yarn is about 190 yards.)
- size 6 DPNs, or size needed to achieve gauge
- 2 lengths of a smooth scrap yarn
- 2 stitch markers
- darning needle
gauge
5.5 stitches and 7 rows per inch, in stockinette
sizing
These mittens were designed to fit a hand that measures 8" in circumference. There is about 1" of ease, resulting in mittens that are about 9" around. If your hand is smaller or larger, or you want a looser or tighter fit for the mitten, play with gauge, stitch count, and row count. It's not that hard once you understand how the mitten is constructed. (Note: I designed these mittens to have about 1" of ease in length, as well. But because the length of the mitten when worn is slightly different then when measured flat, you'll want to try the mitten on as you go to determine the correct length.)
casting on / cuff
Using your preferred stretchy cast on (I prefer Twisted German -- link to pdf), cast on 44 stitches. Distribute over 4 DPNs, and join in the round without twisting. Knit 21 rounds of k2p2 ribbing.
lower hand / thumb gusset
The rest of the mitten is in plain stockinette. On the next (first stockinette) round, increase 6 stitches, for a total of 50 stitches. I did the increases as follows:
Knit one plain round.
Gusset shaping starts on the next round. K24, place marker (pm), make 1 right (m1r), k1, make 1 left (m1l), pm, k25. (If you need instruction on how to make increases, try this site. Their strand increase 1 = my m1r, and their strand increase 2 = my m1l.)
Knit one plain round
Alternate increase and plain rounds 8 times more. For each increase round, create a stitch right after the first stitch marker and right before the second stitch marker, knitting all other stitches between the markers.
At the end of the gusset shaping, there should be 19 stitches between the stitch markers. Knit the next row, placing all 19 of these stitches on scrap yarn (and removing the stitch markers), and casting on one stitch in their place. There should now be 50 stitches on your needles, and 19 thumb stitches on the scrap yarn.
the rest of the hand
Knit around and around, with no increases or decreases, for 33 rows. (An easy way to make the hand longer and shorter is to alter the number of rows you knit in this section.)
decreases and finishing the hand
Knit the next round as follows: ssk, knit 20, k2tog, k1, ssk, knit 20, k2tog, k1
Continue in a similar manner every round, decreasing 4 stitches per round. (It may be helpful to mark the "seam" stitches between the paired decreases with stitch markers.) For example, the next round will be: ssk, knit 18, k2tog, k1, ssk, knit 18, k2tog, k1
When there are only 14 stitches left on the needles (6 from the mitten front, 6 from the mitten back, and the 2 seam stitches between the paired decreases), you are done knitting. Arrange the stitches so they are split between only 2 needles, 7 front and 7 back. Graft these stitches together using kitchener stitch.
thumb
Put the thumb stitches from the scrap yarn back on your needles as follows: 7 on the first DPN, 7 on the second DPN, and 5 on a third DPN. Pick up 2 stitches from the thumb "crotch", and put them on the third DPN, for a total of 7 on that needle. Knit one round, knitting the two picked up stitches through the back loop, to help tighten them up. Knit 10 more rounds plain.
Start thumb decreases: ssk, knit around to 3 stitches before the end of needle 3, k2tog, k1. Repeat this decrease row every round until there are only a total of 9 stitches left on the needles. (You'll have to shift some stitches around from needle 2 to needles 1 and 3.) Break the yarn, and using a tapestry needle, draw it through the 9 stitches, poke it down through the hole in the center at the top of the thumb, and pull tight until the hole is closed.
finishing
Weave in ends, and block as desired. You may need to close up holes at the thumb crotch when weaving in ends, depending on how successful you were at avoiding them when picking up stitches.
And when you're finished with the first mitten, cast on for the second one. Because the thumb grows out of the side of the mitten, there is no designated left or right mitten. This means that you can follow the same instructions for the other mitten.
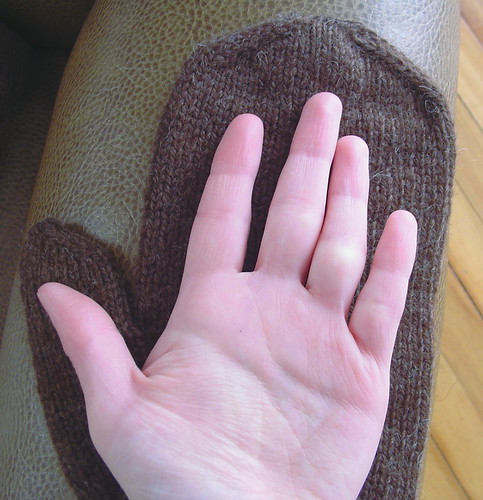
If I were to knit these mittens again, I might do so on smaller needles, at a tighter gauge. These mittens, in this yarn, are acceptable at this gauge, but could be denser. I was concerned about not having enough yarn, when it turns out I only needed 2/3 of what I had. (The rest, though, will go into storage for any future repairs needed on the mittens, hat, or sweater.) If I were to knit these mittens for myself, in the same yarn, I'd simply go down a needle size or two to make them smaller. Alex has bigger hands than I do. See:
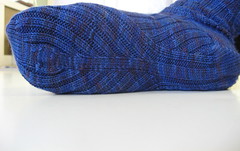
I'm still in simple knitting mode. Simple mittens, and now fairly simple socks. (A chevron/rib pattern, in yarn so bright I'm almost afraid to see what happens when I photograph it.) I have some slightly more complex projects I want to knit with yarn in my stash, but between needle issues and hand pain (not caused by knitting, but certainly affecting it), I'm finding it difficult to get started on anything complex. We'll see how I feel when the socks are done.
Labels: finishedproject, mittens, pattern
posted by Rebekkah at 11:29 AM
![]()
![]()


10 Comments:
Excellent! I had some mittens like this in my mind, and I've been surprised to see that it's difficult to find patterns for the things in my head, so thanks VERY VERY much for sharing your pattern.
Do you have any suggestions for a first lace project?
Very nice. Good job on the thumbs.
I find it is generally best to cycle between the simple and the complex. It keeps my interest in both.
I hope your hand pain leaves you soon.
I am all over this mitten action... thanks for sharing! My BF has been pestering me for some mitts, and these look like the ones! Great choice of wool, too... can't go wrong with all things eco or the awesome natural color palette of cascade's eco! Thanks again!
I have also been in simple knitting mode as of late. Maybe it is the time of year. I have been craving to knit and wear very simple designs.
I hope your hand pain goes away.
Happy Knitting!
That's a great gift project idea -- anything with Eco wool knits up with lightning speed.
Very nice, classic-looking mittens. I might knit them a little big like that and then lightly felt them -- extra warmth! Thanks for sharing the pattern.
Thanks, folks!
Wendy - Blogger tells me that you have your profile set to private. Email me at the address on the front page of my blog, and we'll talk lace.
They are a perfect mitten shape. I've always been fond of the basic mitten in Folk Mittens, if you're looking for others.
changing my name to Alex......
Post a Comment
<< Home