tension
I write to you today from what I'm calling my temperate rainforest. A jungle right outside the windows of my newly put-together "office" space. If I ignore the asphalt out the windows to my left (one of which doesn't have a shade, yet), I look out onto a yard blanketed in green. There is the soothing sound of rain, and a flowering tree right outside my window, drooping from the combined weight of blossoms and water. I've had my little office space set up for a week now, and I can't get enough of it. I just thought you needed to know that.
On my new, beautiful desk, to my left, sit three skeins of yarn. I still find the idea of a millspun, storebought stash kind of boring, but opening up my handspun drawer is a remedy for the dreariest of moods. I made that! I think I always need to keep a skein or three of handspun on the desk, too.
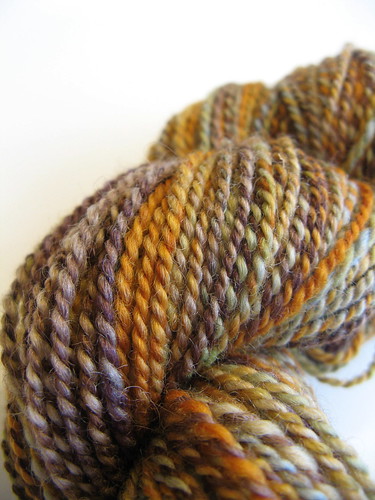
The first skein is a colorful merino, made from fiber bought from Crazy Monkey Creations.

It's 110 grams, 382 yards, and an 18 wpi fingering weight yarn. Because of the bright, contrasting colors, I decided to Navajo ply the yarn. It was my first large-scale Navajo plying project on the wheel (I'd done a bunch of test runs with leftover singles, previously), and I learned a lot. I knew, going in, that my basic strategy was going to be one of divide and conquer. I was going to divide the plying process into three distinct steps: 1. make a chain or two, as long as I could reach, 2. get that chain onto the bobbin (and repeat steps 1 and 2, until...), 3. re-ply the bobbin, adding twist.
The logic of this divide and conquer technique is that Navajo plying can be complicated, and because of the way the chaining can prevent twist from truly spreading evenly across the length of a yarn, it's best to concentrate on twist separatly from plying. I decided, about halfway through the plying that dividing up the act of chaining and the act of treadling wasn't working for me. I was trying to chain too big, which meant I lost control over my work, and allowed twist to enter unevenly into the yarn. I think one of the big dangers with Navajo plying is having twist enter two of the three plies before the third ply is there, to get twisted up with the other two. This leads to a lumpy mess. (Or at least, a yarn that isn't as nice as it could be.) By trying to make really long chains, losing some of the tension on them, and then treadling them onto the bobbin, I was having this twist problem. I solved it by making smaller, more manageable chains with my right hand only, controlling the twist as well as I could with my left hand, and treadling as steadily as possible to keep tension on the strands, and keep them pulling onto the bobbin.
The key with my technique is to use the largest whorl you have, and set your wheel for strong uptake onto the bobbin. I want to call the first step "chain and wind", because any twist that enters the yarn is incidental. The point of that first step is to get your chains made, and to get the yarn safely onto the bobbin. The point of the second step is to add the twist. This way, you can concentrate more fully on each step, and hopefully get a neater result. I'm fairly pleased with the results for this yarn, but it could be improved. I learned that smaller, neater, and more controlled chains might be a better thing than large, messy, uncontrolled chains. I still made the chains as big as I could, but changed my definition of "could" from "as far as my arms can stretch" to "what I can keep under control".
I hope that explanation made sense. The technique works really well for me, now that I've worked out the kinks, and I think that some of the people out there who openly complain about the difficulty of Navajo plying well (with good reason!) might benefit from trying this divide and conquer technique.
My next Navajo plied yarn went much more smoothly.
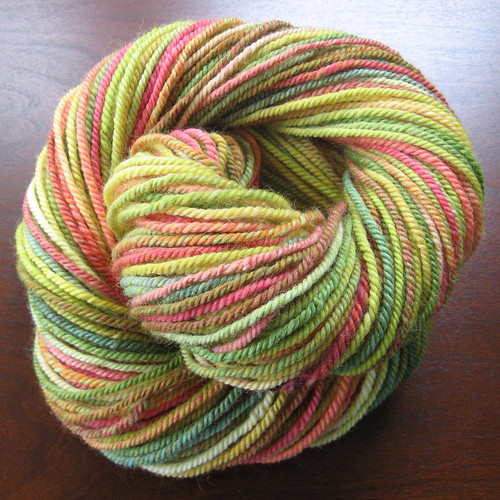
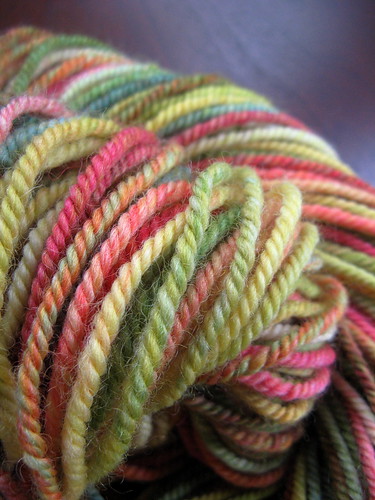
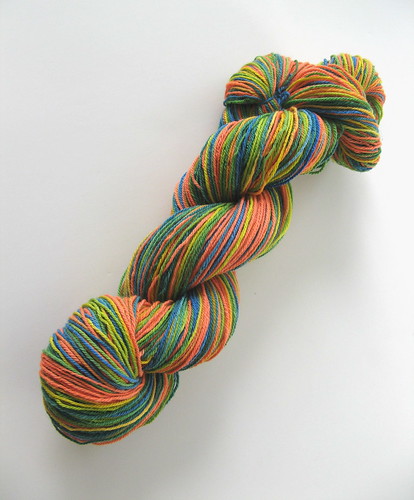
This yarn was spun from Falklands roving, in the Zinnia colorway, from Fat Cat Knits. A photo of the pre-drafted roving can be found here, and two more photos of the finished yarn here and here.
This yarn was somewhat of a surprise. I knew from the outset that I wanted to Navajo ply, to maintain the gorgeous colors. I didn't split the roving at all before I spun it, to keep the runs of color as long and true as possible. In my head, I thought I'd go for a worsted weight yarn, and so I started spinning my singles for a worsted weight yarn -- a 2-ply worsted weight yarn. Whoops! In the end, my Navajo plied yarn is 121 grams 102 yards, and 9.5 wip untensioned (12.5 wpi tensioned), for a bulky weight yarn. I will explain that untensioned/tensioned thing when I discuss my next yarn, so keep on reading! It's not the yarn I expected to make, but it is downright gorgeous, and I'm very proud of it. It will make a smashing hat.
The third yarn I have for you today was actually spun before the Zinnia Falklands. It was a complete splurge purchase, from a dyer whose work I've been admiring for a while. I needed some easy as pie comfort knitting, and it's pink and purple wool, so I called it girly comfort yarn. While that does bring up connotations of women in flowing white dresses discussing how fresh they feel, I'm sticking with the name.
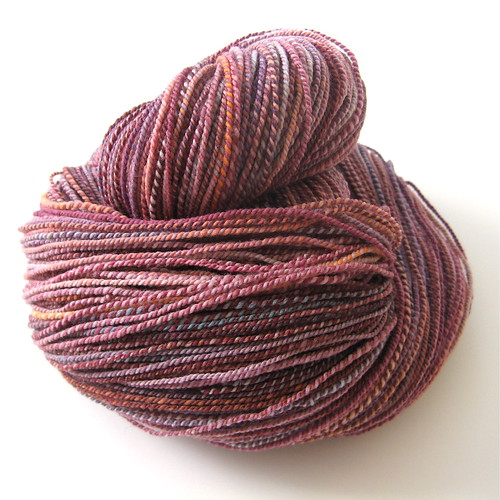
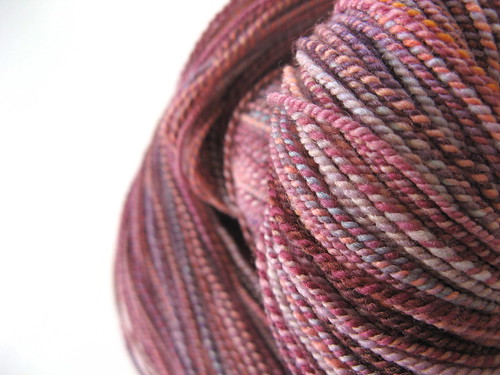
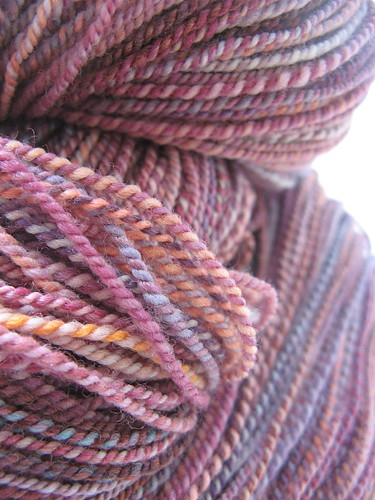
The fiber is merino, from Freckle Face Fibers. First of all, this was my favorite non-superwash merino, ever. It reminded me a lot of the superwash merino that came in my BMFA Sheep 2 Shoe kit. It was incredibly boucy, soft, and springy. She must get her merino from the happiest sheep in the world!
Because the wool was so bouncy, it surprised me a bit. I originally split the roving into three equal sized lumps, to make a fingering weight 3 ply. But when I did ply-back tests, I found that I had been unintentionally spinning it thicker than I wanted. As soon as it had a chance to fluff and breathe, during ply-back, it sproined out into something thicker than I expected. It was pretty clear that I was spinning singles appropriate for a 2-ply fingering weight, not a 3-ply, so I re-split the roving and went with that. In the end, I had 110 grams, and 372 yards, at 16 wpi (untensioned), and 22 wpi (tensioned).
So this whole tensioned/untensioned thing, huh? For those of you new to this stuff, wpi stands for "wraps per inch". It's basically a count of how many widths of your yarn will fit into an inch, or any other unit you choose to use. I try to do my wpi measurements untensioned, and lay the strands right next to each other, not making any effort to squeeze them in at all, but trying to get them right up next to each other, as closely as they naturally go. Another way to do a wpi count is under some tension. Looking at things like the wpi counts for yarns in the backs of issues of Interweave Knits, or even "suggested" wpi counts for different "weight" yarns on different wpi measurement tools, on Ravelry (whose counts I think are way out there!), and other places, it's obvious that different people are going to get different wpi counts for the same yarn. I think it's like gauge -- there may be an average gauge for yarn X with needles Y, but you've got to find out what your gauge is with yarn X and needles Y for the numbers to be of any use to you. Everyone will do their wraps a bit differently, and just like with gauge, there is always the temptation to "cheat" the numbers a bit, so you get what you think you "should" get, as opposed to seeing what the reality is.
It was the "girly comfort" yarn above that got me really wondering about tensioned vs. untensioned wpi. The yarn, untensioned, has fewer wpi than I'd expect for it. The wpi tell me that it's a sport weight, when I definitely think it will knit up as a fingering weight. Just looking at it on my desk (and I apologize that I don't have a photo with a coin or other small object for comparison, for you guys), I can buy that some people might call it a light sport weight. But I know it's a fingering weight at heart. Part of that has to do with its loft and bounce. The fiber I used was very lofty and bouncy, and the way I spun and plied it left it with a lot of loft and bounce. It's very stretchy, and you can see the diameter of the yarn get smaller if you take a length of it and stretch it taught. This is a good thing for a yarn! You knit it with some tension, and then watch it relax and bloom into place for a nice, firm, elastic fabric. Perfect for socks. But it leads me to believe that there is information to be gained from a tensioned wpi count, because it is under that tension when you knit it.
My tensioned wpi count for the girly comfort yarn is 22, which for me makes it a light fingering weight. How do I reconcile 16 and 22? I don't know, but I can tell you that I had some Socks That Rock lightweight sitting nearby as I did the wpi for this yarn, and according to the way I measure wpi, the STR was 16 wpi untensioned, and 22 wpi tensioned. (That thud you hear is the sound of my jaw hitting the floor!) This tells me that my yarn is very, very similar to STR lightweight, even though it is a 2 ply, and STR is a 3 ply. At the very least, they should be suitable for similar sized needles (though the ply number may affect that), and they are very similar in how stretchy and bouncy they are.
So while I haven't come to peace yet with exactly what untensioned vs. tensioned wpi means for determining a yarn's "weight", it does seem to be a good way to help compare it to commercial yarns. Presumably, the difference between tensioned and untensioned wpi says something about the yarn's stretch and bounce -- the bigger the difference, the sproingier the yarn. And I have a gut feeling that it's safer to call a 16/22 (untensioned/tensioned) wpi yarn a fingering weight yarn than it is to call a 16/18 wpi a fingering weight. I have a feeling the latter would definitely feel like a sport weight yarn. I wish I had the control over my spinning to make one, so I cound test it out, but I'm not there yet. (I suppose using a less crimpy fiber, with less ply, twist would be a start?)
I'm really into this untensioned/tensioned wpi thing (though I'm sick of typing it!), and plan to test this on my old yarns, as I knit them up. I think the second measurement adds a lot of info to the first, and may help explain why two yarns that appear to be the same thickness and yards per pound may act so differently. At a gut level, this is something I already realized. But it's taking numbers to get me to a higher level of understanding, as a spinner who really wants to know and understand what she's making! If you want, join in on the experiment, and start doing both untensioned and tensioned wpi measurements on your yarns, and even more importantly, start reporting them! While what you measure as 20 wpi may be a 18 wpi for me or a 22 wpi for someone else, I think what's important here is the relative measure between tensioned and untensioned. I'm officially starting a movement, so please join me!
(And for the sake of truthfulness, since I started composing this post a trip to Home Depot has been made, and the shade has been repaired and hung. If you still remember what that refers to, after reading through this entire post!)
On my new, beautiful desk, to my left, sit three skeins of yarn. I still find the idea of a millspun, storebought stash kind of boring, but opening up my handspun drawer is a remedy for the dreariest of moods. I made that! I think I always need to keep a skein or three of handspun on the desk, too.
The first skein is a colorful merino, made from fiber bought from Crazy Monkey Creations.


It's 110 grams, 382 yards, and an 18 wpi fingering weight yarn. Because of the bright, contrasting colors, I decided to Navajo ply the yarn. It was my first large-scale Navajo plying project on the wheel (I'd done a bunch of test runs with leftover singles, previously), and I learned a lot. I knew, going in, that my basic strategy was going to be one of divide and conquer. I was going to divide the plying process into three distinct steps: 1. make a chain or two, as long as I could reach, 2. get that chain onto the bobbin (and repeat steps 1 and 2, until...), 3. re-ply the bobbin, adding twist.
The logic of this divide and conquer technique is that Navajo plying can be complicated, and because of the way the chaining can prevent twist from truly spreading evenly across the length of a yarn, it's best to concentrate on twist separatly from plying. I decided, about halfway through the plying that dividing up the act of chaining and the act of treadling wasn't working for me. I was trying to chain too big, which meant I lost control over my work, and allowed twist to enter unevenly into the yarn. I think one of the big dangers with Navajo plying is having twist enter two of the three plies before the third ply is there, to get twisted up with the other two. This leads to a lumpy mess. (Or at least, a yarn that isn't as nice as it could be.) By trying to make really long chains, losing some of the tension on them, and then treadling them onto the bobbin, I was having this twist problem. I solved it by making smaller, more manageable chains with my right hand only, controlling the twist as well as I could with my left hand, and treadling as steadily as possible to keep tension on the strands, and keep them pulling onto the bobbin.
The key with my technique is to use the largest whorl you have, and set your wheel for strong uptake onto the bobbin. I want to call the first step "chain and wind", because any twist that enters the yarn is incidental. The point of that first step is to get your chains made, and to get the yarn safely onto the bobbin. The point of the second step is to add the twist. This way, you can concentrate more fully on each step, and hopefully get a neater result. I'm fairly pleased with the results for this yarn, but it could be improved. I learned that smaller, neater, and more controlled chains might be a better thing than large, messy, uncontrolled chains. I still made the chains as big as I could, but changed my definition of "could" from "as far as my arms can stretch" to "what I can keep under control".
I hope that explanation made sense. The technique works really well for me, now that I've worked out the kinks, and I think that some of the people out there who openly complain about the difficulty of Navajo plying well (with good reason!) might benefit from trying this divide and conquer technique.
My next Navajo plied yarn went much more smoothly.


This yarn was spun from Falklands roving, in the Zinnia colorway, from Fat Cat Knits. A photo of the pre-drafted roving can be found here, and two more photos of the finished yarn here and here.
This yarn was somewhat of a surprise. I knew from the outset that I wanted to Navajo ply, to maintain the gorgeous colors. I didn't split the roving at all before I spun it, to keep the runs of color as long and true as possible. In my head, I thought I'd go for a worsted weight yarn, and so I started spinning my singles for a worsted weight yarn -- a 2-ply worsted weight yarn. Whoops! In the end, my Navajo plied yarn is 121 grams 102 yards, and 9.5 wip untensioned (12.5 wpi tensioned), for a bulky weight yarn. I will explain that untensioned/tensioned thing when I discuss my next yarn, so keep on reading! It's not the yarn I expected to make, but it is downright gorgeous, and I'm very proud of it. It will make a smashing hat.
The third yarn I have for you today was actually spun before the Zinnia Falklands. It was a complete splurge purchase, from a dyer whose work I've been admiring for a while. I needed some easy as pie comfort knitting, and it's pink and purple wool, so I called it girly comfort yarn. While that does bring up connotations of women in flowing white dresses discussing how fresh they feel, I'm sticking with the name.


The fiber is merino, from Freckle Face Fibers. First of all, this was my favorite non-superwash merino, ever. It reminded me a lot of the superwash merino that came in my BMFA Sheep 2 Shoe kit. It was incredibly boucy, soft, and springy. She must get her merino from the happiest sheep in the world!
Because the wool was so bouncy, it surprised me a bit. I originally split the roving into three equal sized lumps, to make a fingering weight 3 ply. But when I did ply-back tests, I found that I had been unintentionally spinning it thicker than I wanted. As soon as it had a chance to fluff and breathe, during ply-back, it sproined out into something thicker than I expected. It was pretty clear that I was spinning singles appropriate for a 2-ply fingering weight, not a 3-ply, so I re-split the roving and went with that. In the end, I had 110 grams, and 372 yards, at 16 wpi (untensioned), and 22 wpi (tensioned).
So this whole tensioned/untensioned thing, huh? For those of you new to this stuff, wpi stands for "wraps per inch". It's basically a count of how many widths of your yarn will fit into an inch, or any other unit you choose to use. I try to do my wpi measurements untensioned, and lay the strands right next to each other, not making any effort to squeeze them in at all, but trying to get them right up next to each other, as closely as they naturally go. Another way to do a wpi count is under some tension. Looking at things like the wpi counts for yarns in the backs of issues of Interweave Knits, or even "suggested" wpi counts for different "weight" yarns on different wpi measurement tools, on Ravelry (whose counts I think are way out there!), and other places, it's obvious that different people are going to get different wpi counts for the same yarn. I think it's like gauge -- there may be an average gauge for yarn X with needles Y, but you've got to find out what your gauge is with yarn X and needles Y for the numbers to be of any use to you. Everyone will do their wraps a bit differently, and just like with gauge, there is always the temptation to "cheat" the numbers a bit, so you get what you think you "should" get, as opposed to seeing what the reality is.
It was the "girly comfort" yarn above that got me really wondering about tensioned vs. untensioned wpi. The yarn, untensioned, has fewer wpi than I'd expect for it. The wpi tell me that it's a sport weight, when I definitely think it will knit up as a fingering weight. Just looking at it on my desk (and I apologize that I don't have a photo with a coin or other small object for comparison, for you guys), I can buy that some people might call it a light sport weight. But I know it's a fingering weight at heart. Part of that has to do with its loft and bounce. The fiber I used was very lofty and bouncy, and the way I spun and plied it left it with a lot of loft and bounce. It's very stretchy, and you can see the diameter of the yarn get smaller if you take a length of it and stretch it taught. This is a good thing for a yarn! You knit it with some tension, and then watch it relax and bloom into place for a nice, firm, elastic fabric. Perfect for socks. But it leads me to believe that there is information to be gained from a tensioned wpi count, because it is under that tension when you knit it.
My tensioned wpi count for the girly comfort yarn is 22, which for me makes it a light fingering weight. How do I reconcile 16 and 22? I don't know, but I can tell you that I had some Socks That Rock lightweight sitting nearby as I did the wpi for this yarn, and according to the way I measure wpi, the STR was 16 wpi untensioned, and 22 wpi tensioned. (That thud you hear is the sound of my jaw hitting the floor!) This tells me that my yarn is very, very similar to STR lightweight, even though it is a 2 ply, and STR is a 3 ply. At the very least, they should be suitable for similar sized needles (though the ply number may affect that), and they are very similar in how stretchy and bouncy they are.
So while I haven't come to peace yet with exactly what untensioned vs. tensioned wpi means for determining a yarn's "weight", it does seem to be a good way to help compare it to commercial yarns. Presumably, the difference between tensioned and untensioned wpi says something about the yarn's stretch and bounce -- the bigger the difference, the sproingier the yarn. And I have a gut feeling that it's safer to call a 16/22 (untensioned/tensioned) wpi yarn a fingering weight yarn than it is to call a 16/18 wpi a fingering weight. I have a feeling the latter would definitely feel like a sport weight yarn. I wish I had the control over my spinning to make one, so I cound test it out, but I'm not there yet. (I suppose using a less crimpy fiber, with less ply, twist would be a start?)
I'm really into this untensioned/tensioned wpi thing (though I'm sick of typing it!), and plan to test this on my old yarns, as I knit them up. I think the second measurement adds a lot of info to the first, and may help explain why two yarns that appear to be the same thickness and yards per pound may act so differently. At a gut level, this is something I already realized. But it's taking numbers to get me to a higher level of understanding, as a spinner who really wants to know and understand what she's making! If you want, join in on the experiment, and start doing both untensioned and tensioned wpi measurements on your yarns, and even more importantly, start reporting them! While what you measure as 20 wpi may be a 18 wpi for me or a 22 wpi for someone else, I think what's important here is the relative measure between tensioned and untensioned. I'm officially starting a movement, so please join me!
(And for the sake of truthfulness, since I started composing this post a trip to Home Depot has been made, and the shade has been repaired and hung. If you still remember what that refers to, after reading through this entire post!)
Labels: spinning


